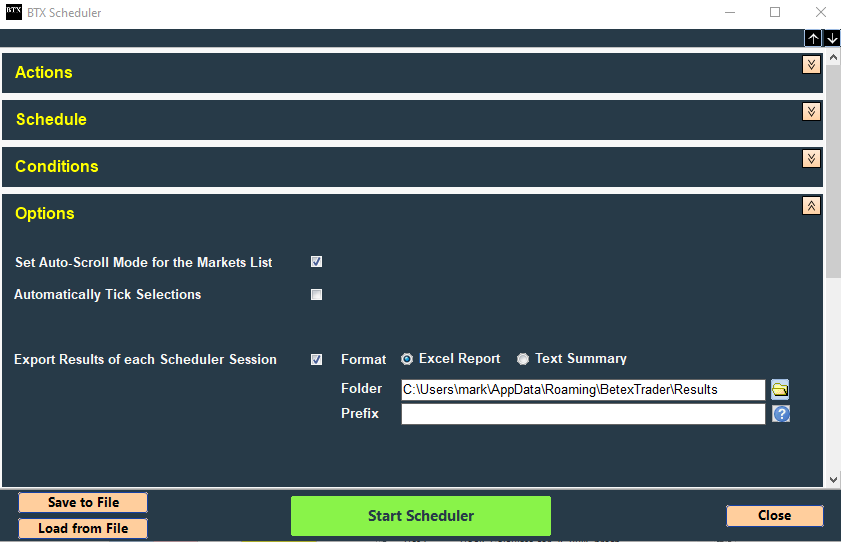
Main Menu - Scheduler
This utility provides you with the ability to load markets, attach a bet plan to each market and start trading, all with just a single button click.
This can be set to run as a single session, or repeated on a daily basis.
The Scheduler set up screen is divided into 5 sections:
Scheduler – Actions
- Load Market Filters From Saved File – Specify the name and location of a previously saved market filters file for loading the required markets.
- Use Bet Plan From Saved File – Specify the name and location of a previously saved bet plan. This will be attached to all loaded markets.
- Set Betting Mode – Specify if you want the trading session(s) to be run in Real or Simulation mode.

Scheduler – Schedule
- Start Time – Specify the date and time at which you require the Scheduler session to start.
- Frequency – Specify the whether you want the Scheduler to run just once, or repeated at the same time each day.

Scheduler – Conditions
- All Previously Loaded Markets Must Be Closed – If this condition is ticked when a Scheduler session is due to start and there are already markets loaded,
then the Scheduler will wait until these markets are all closed before starting the session. NOTE that if you have opted to export results
(see the Options section below) then the Scheduler will always wait for currently loaded markets to close.
This is because a full set of results cannot be generated until the outcome of each market is known.

Scheduler – Options
- Set Auto-Scroll Mode for the Market List – If ticked then when the session is started and markets have been loaded, the “Auto Scroll” option on the
main screen will be ticked.
- Automatically Tick Selections – For users who have a bet plan that places bets on a ticked selection, this option provides a couple of simple
methods for automatically ticking selections when markets are loaded by the Scheduler. By Name – for example you may have a plan that places a bet on the draw outcome of football Match Odds markets. To automatically tick this selection you can specify “The Draw” here. By Selection Order – for example you may have a plan that places a bet on the away team of football Match Odds markets.
The away team is always listed as the second selection in the market. So to automatically tick this selection you can specify order number 2 here.

- Export Results of each Scheduler Session – This option provide the ability to generate a results file when a Scheduler session is complete and all markets are closed.
Two report formats are supported. Excel Report – This is an Excel file with the same content as that produced if you clicks on the “Export Results”
button at the bottom of the Results tab on the main screen. Text Summary – This is a more simple text format and the content is very similar to that
displayed on the Results tab on the main screen. For both formats you needs to specify the folder in which he wants the file to be generated.
The filenames will be of a standard format but you can optionally specify a prefix that will be added to the front of the filename so that he can
easily recognize particular reports.
1.1.1.5 Scheduler – Buttons
- Save to File – This button enables you to save the content of the Scheduler configuration screen to file.
- Load from File – This button enables you to load a previously saved Scheduler configuration. When loading a previous configuration ensure you check that the schedule start time is brought up to date.
- Start Scheduler – Clicking this button will activate the Scheduler. The status bar at the bottom of the main screen will display a green panel to indicate that the Scheduler is active. The panel size adjuster sliders will also be coloured green. The progress of the Scheduler will be updated on the Messages tab. To stop the Scheduler you can click on the “STOP SCHEDULER TRADING” button at the top of the screen, or simply close the BTX.
